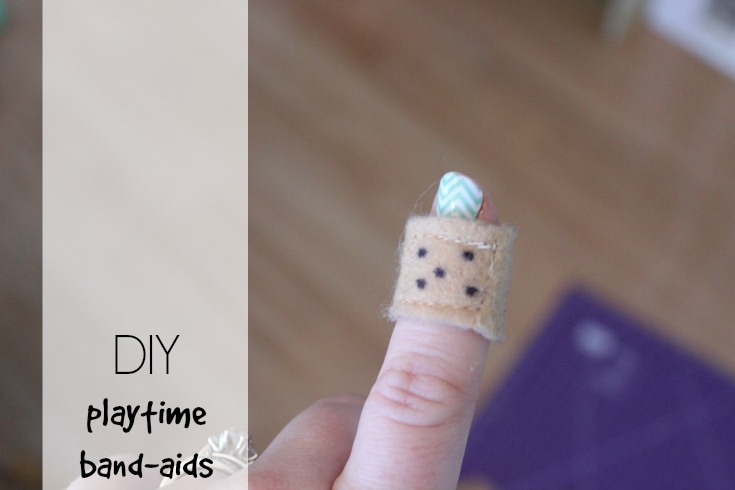
I’m so excited to bring you this DIY thanks to April from Little Squirrel Creations. Saw her post on Facebook and asked if she would be nice enough to share a tutorial on how to make them with my readers. Sofia Marie is going through the whole “doctor” phase right now, putting band-aids on everything, dolls, stuffed animals, people, anyone that will sit long enough to pretend they are badly hurt and needing her care. She loves to make people “all-better” and as we all know a band-aid fixes everything. At the rate we are currently going, it’s going to cost me $20 a week to let her “fix her patients” and this friends is when these playtime band-aids come in handy. REALLY handy!
So without further ado, let’s all thanks April for sharing her felt band-aid tutorial with us, and for those of you who want some but can’t spare the time to make ’em, fear none, April sells them for $5 for a 10 pack {$1.75 shipping within Canada and $2.00 to the US}. Reach out to April on her Facebook page here to place and order; or go ahead and get your craft on.
——————————————————————————————————————————————————————————————————————–
I was having a conversation with another crafter and mom at last weekend’s craft fair. She made comment about asking another sewing friend to maybe make her son some felt bandages as he was using all of the real bandages on every bump a bruise (as well as imaginary ones) and she had to buy new ones all the time, costing her a small fortune. So I decided to make an attempt and see what I could come up with. It turns out it’s pretty simple to do- and so I have been asked to share it with you.
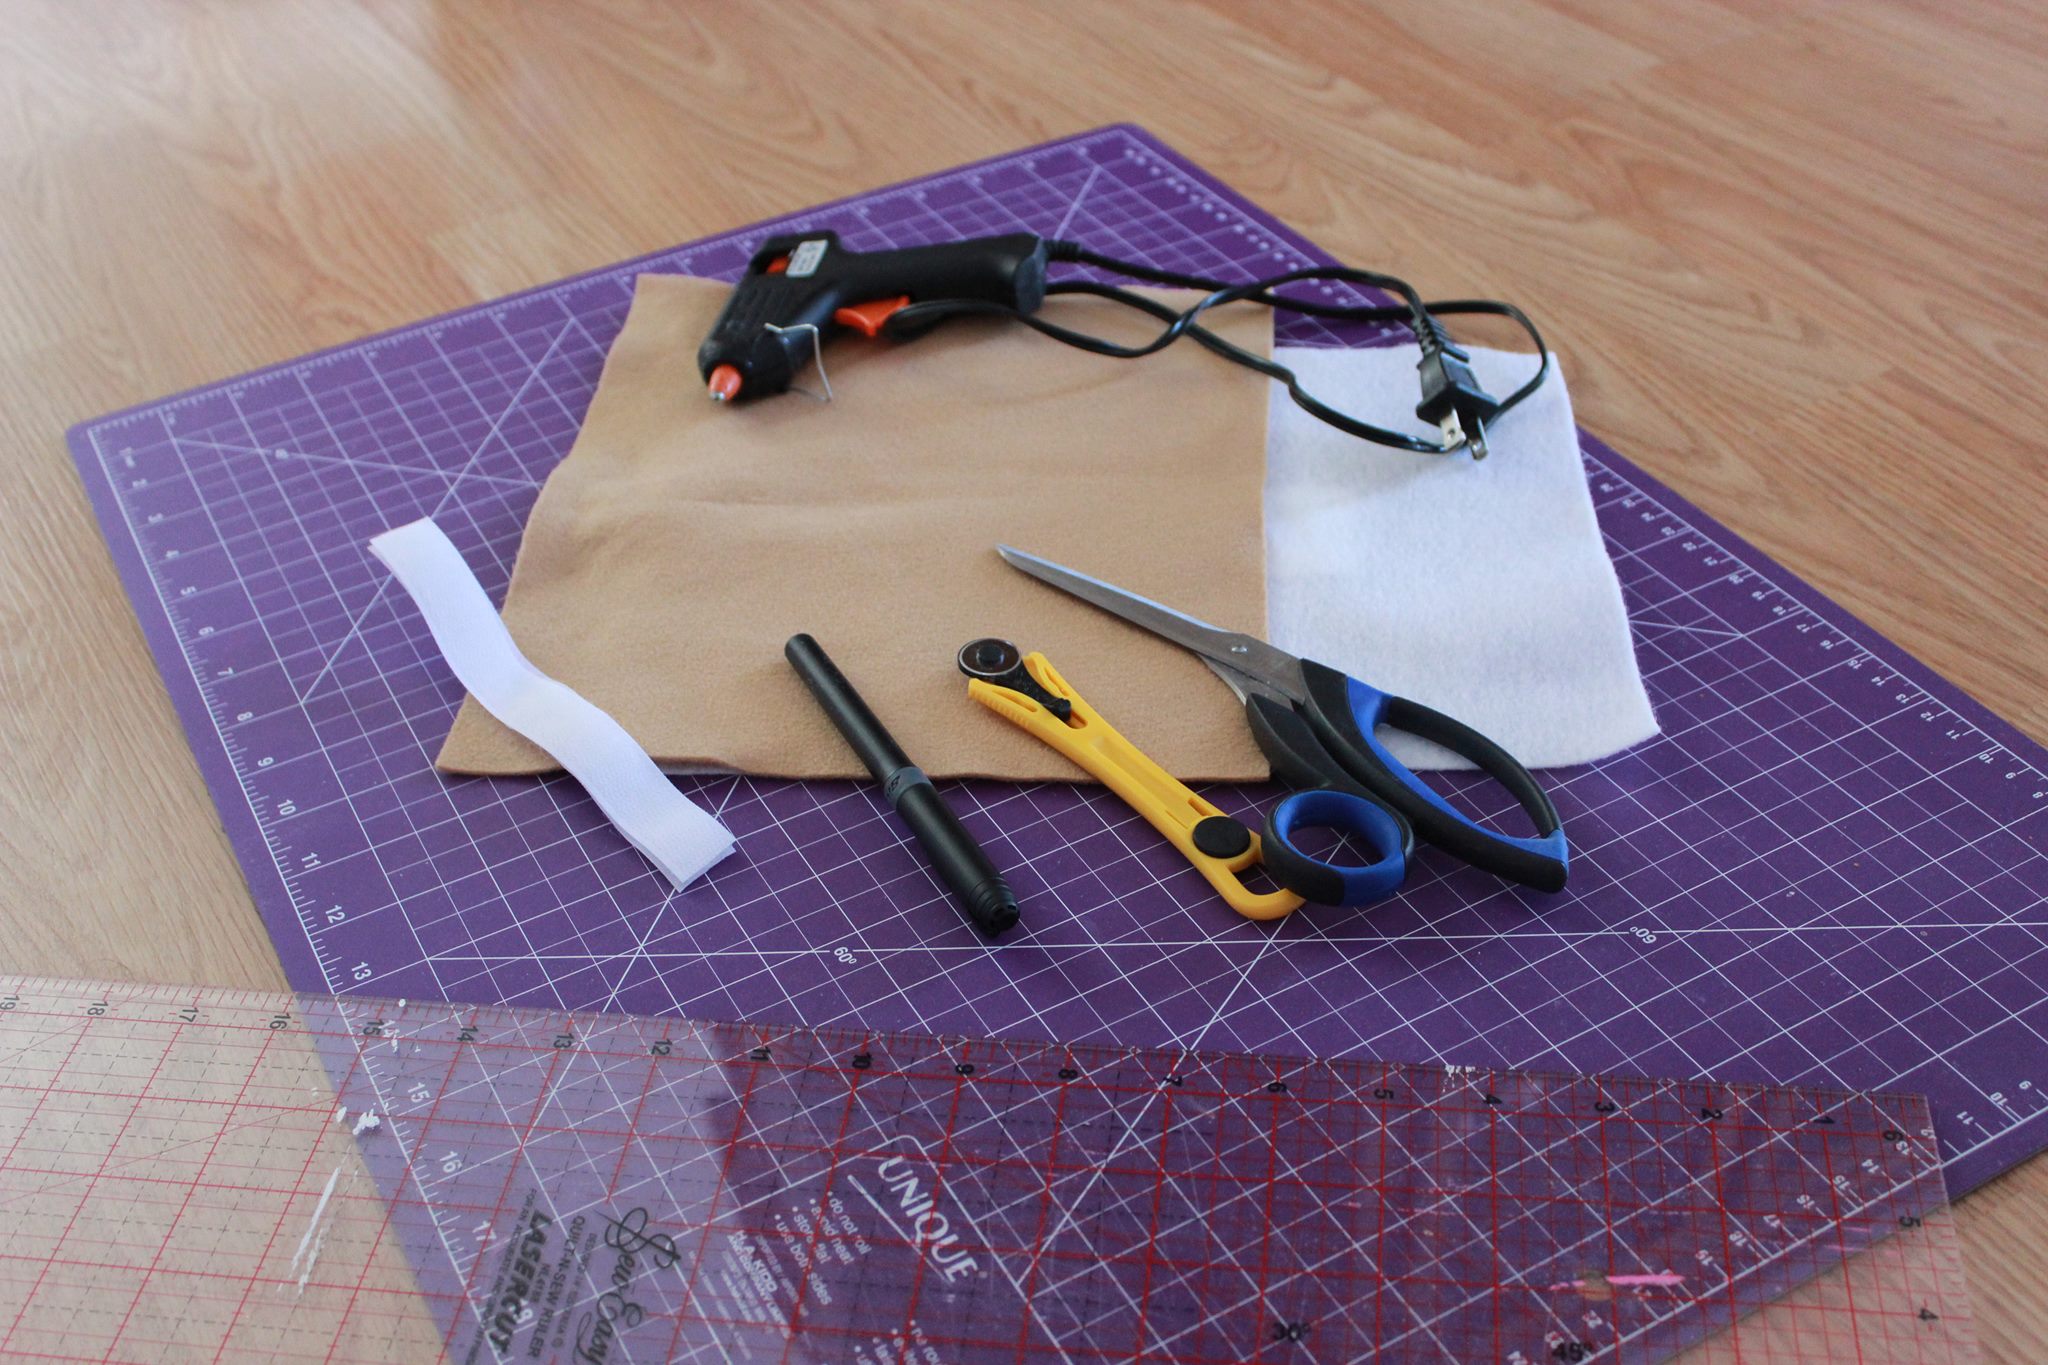
You will need:
1 sheet of tan felt
1 sheet of white felt
Velcro (the sew-on kind)
Cutting mat
Clear sewing ruler
Rotary cutter
Scissors
Hot glue gun & extra glue sticks
Paper plate (for under the glue gun to protect your counter and cutting mat)
Optional Sewing machine and matching thread to the ‘bandage’ color
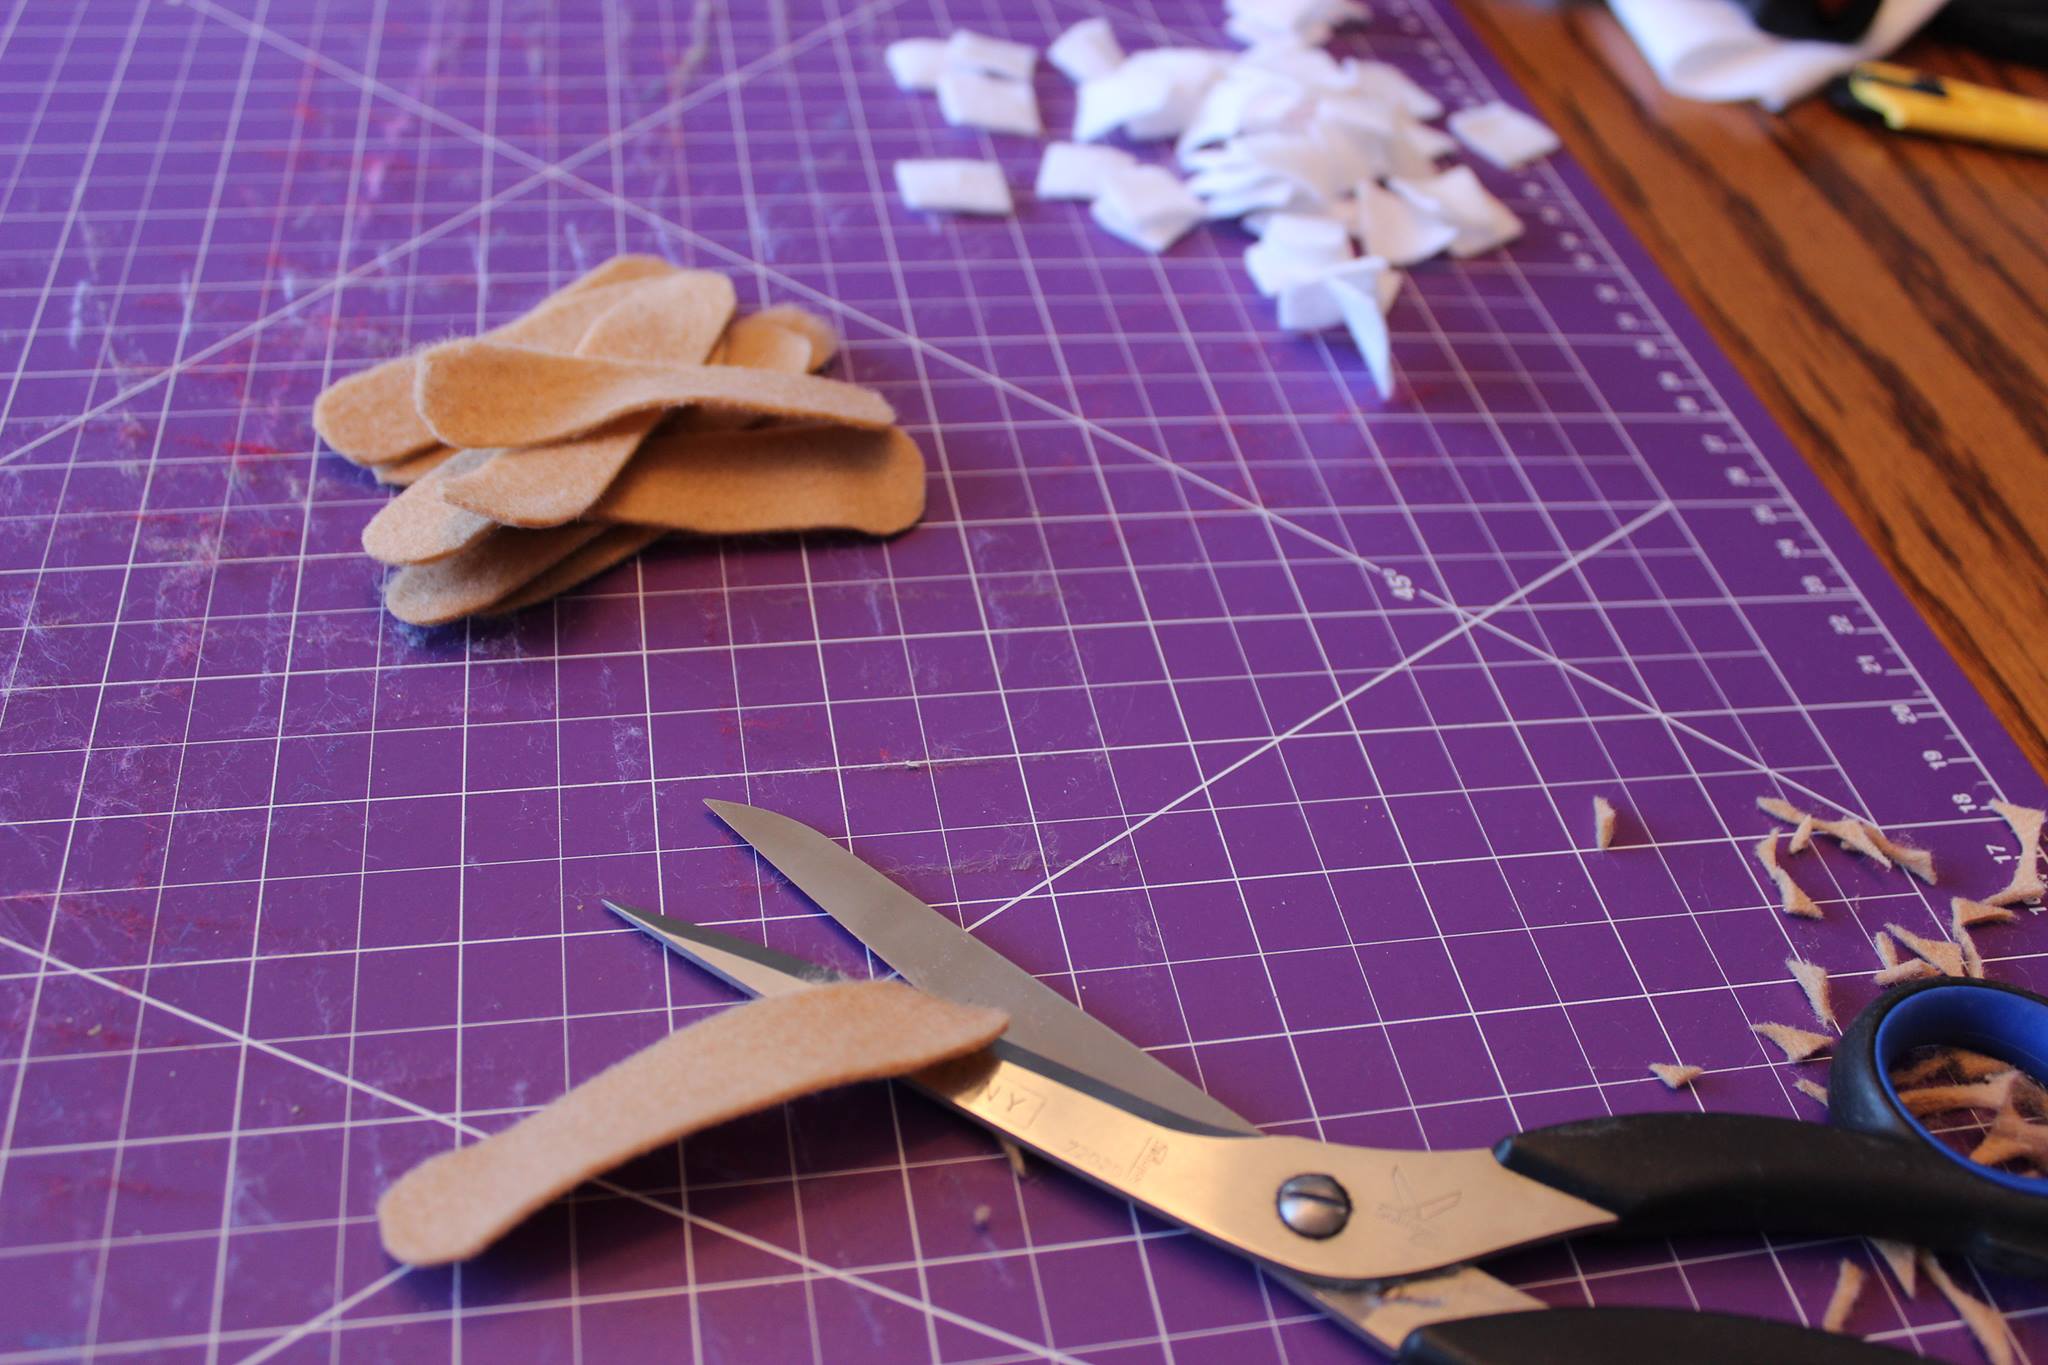
- First I cut the ‘bandages’ out of the tan felt. I divided the felt into 3 equal lengths lengthwise (3 inches each)
- From the three strips, I cut ¾ inch pieces
- Next cut the white felt in slim ¾ inch strips (this is your ‘gauze pad’ of the bandage)
- From that narrow strip, I kind of got lazy as far as measurement and cut with the rotary cutter approximate squares to fit the bandages, scissors work too for all of the above steps but tends to be less accurate.
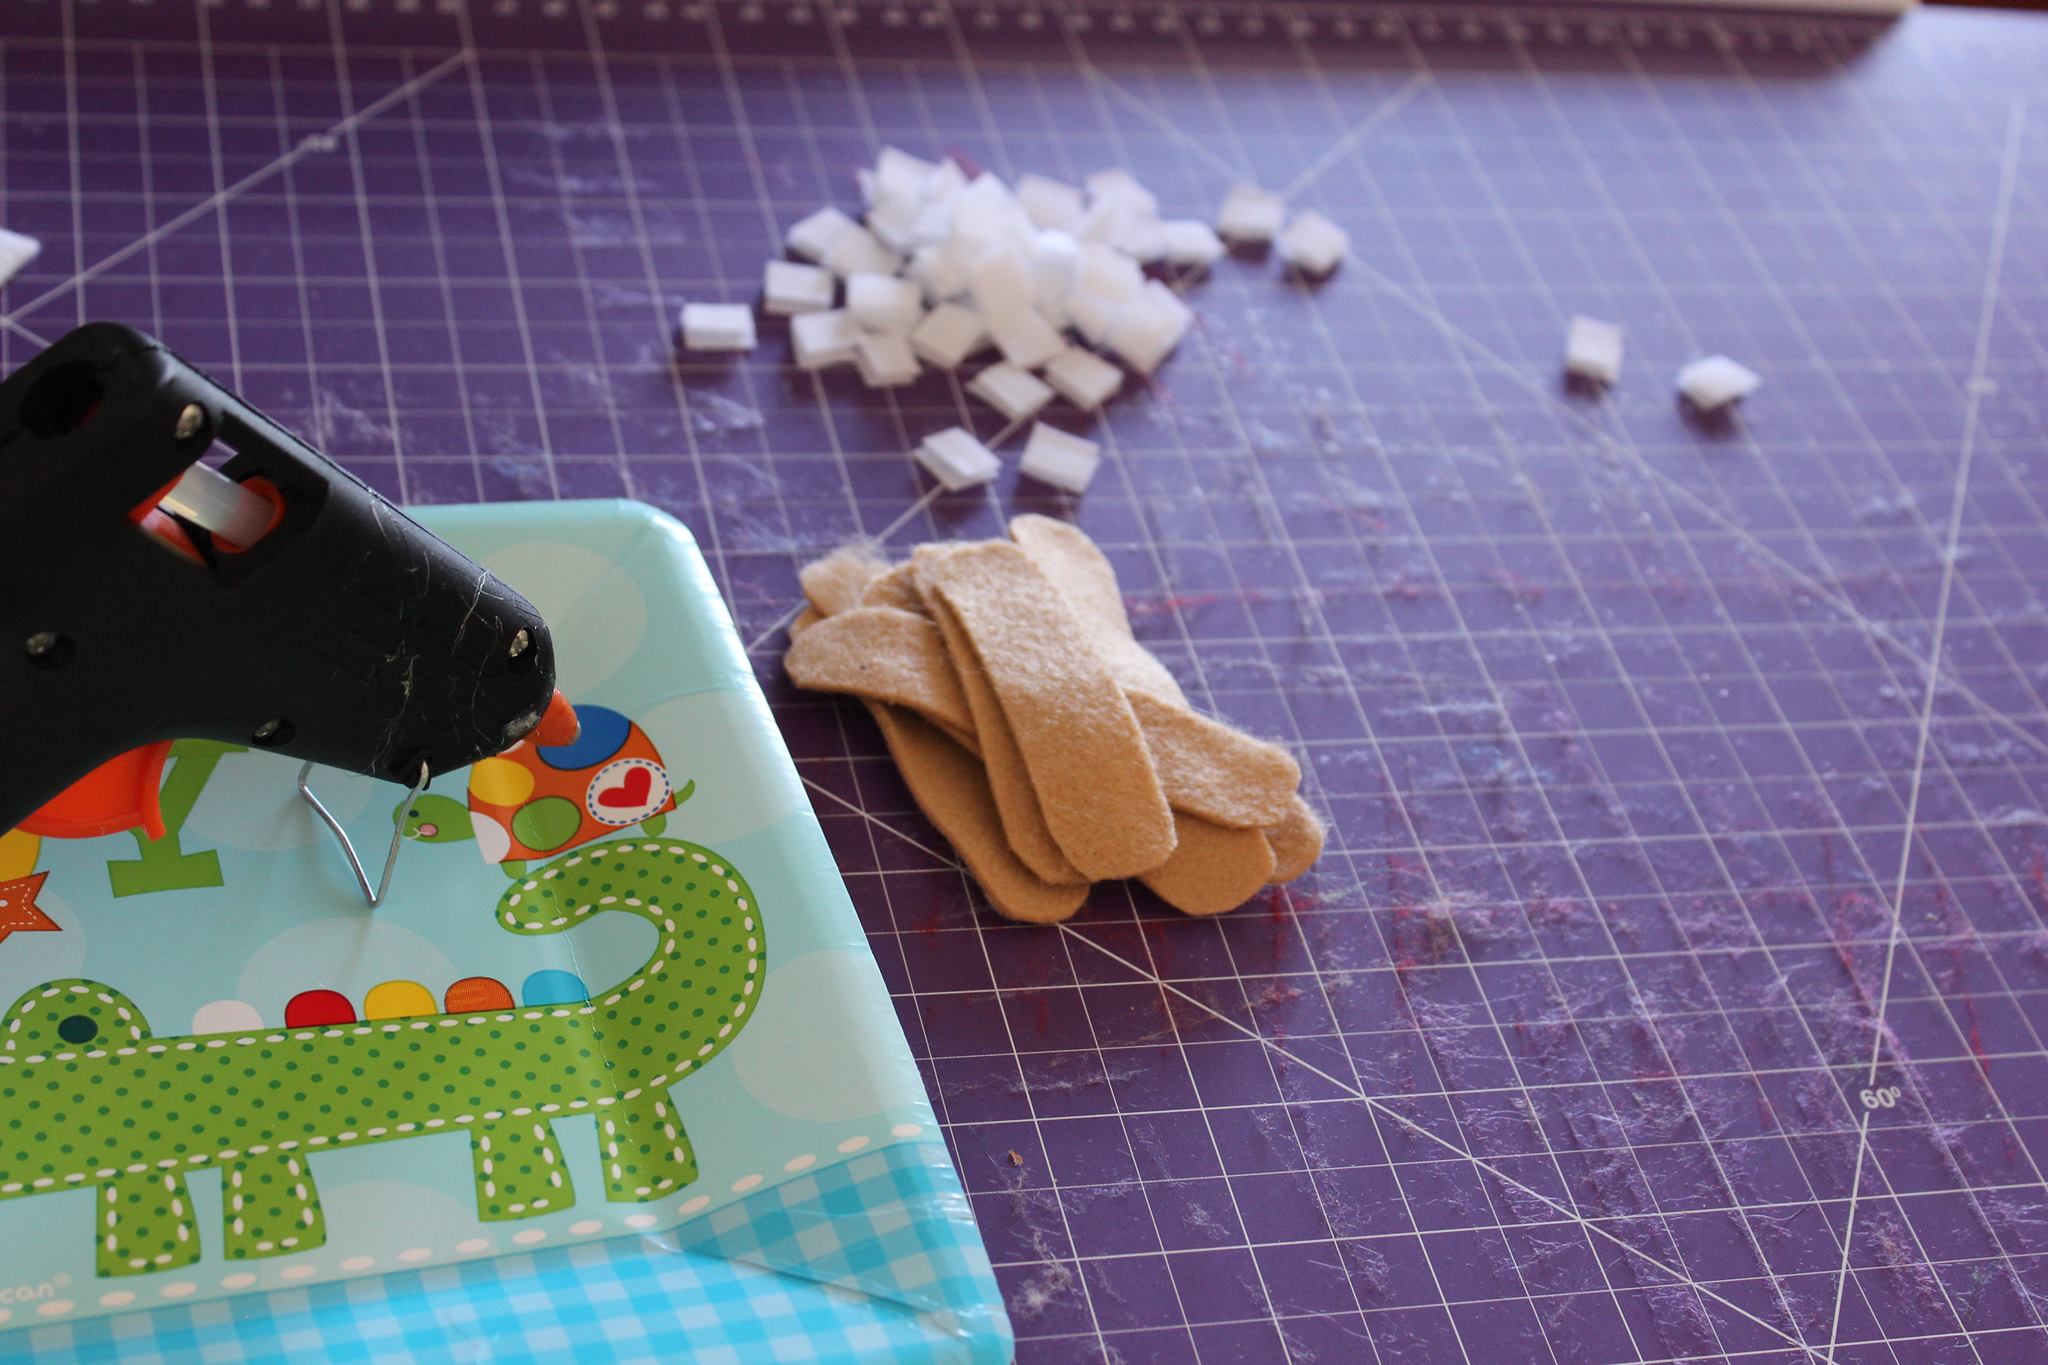
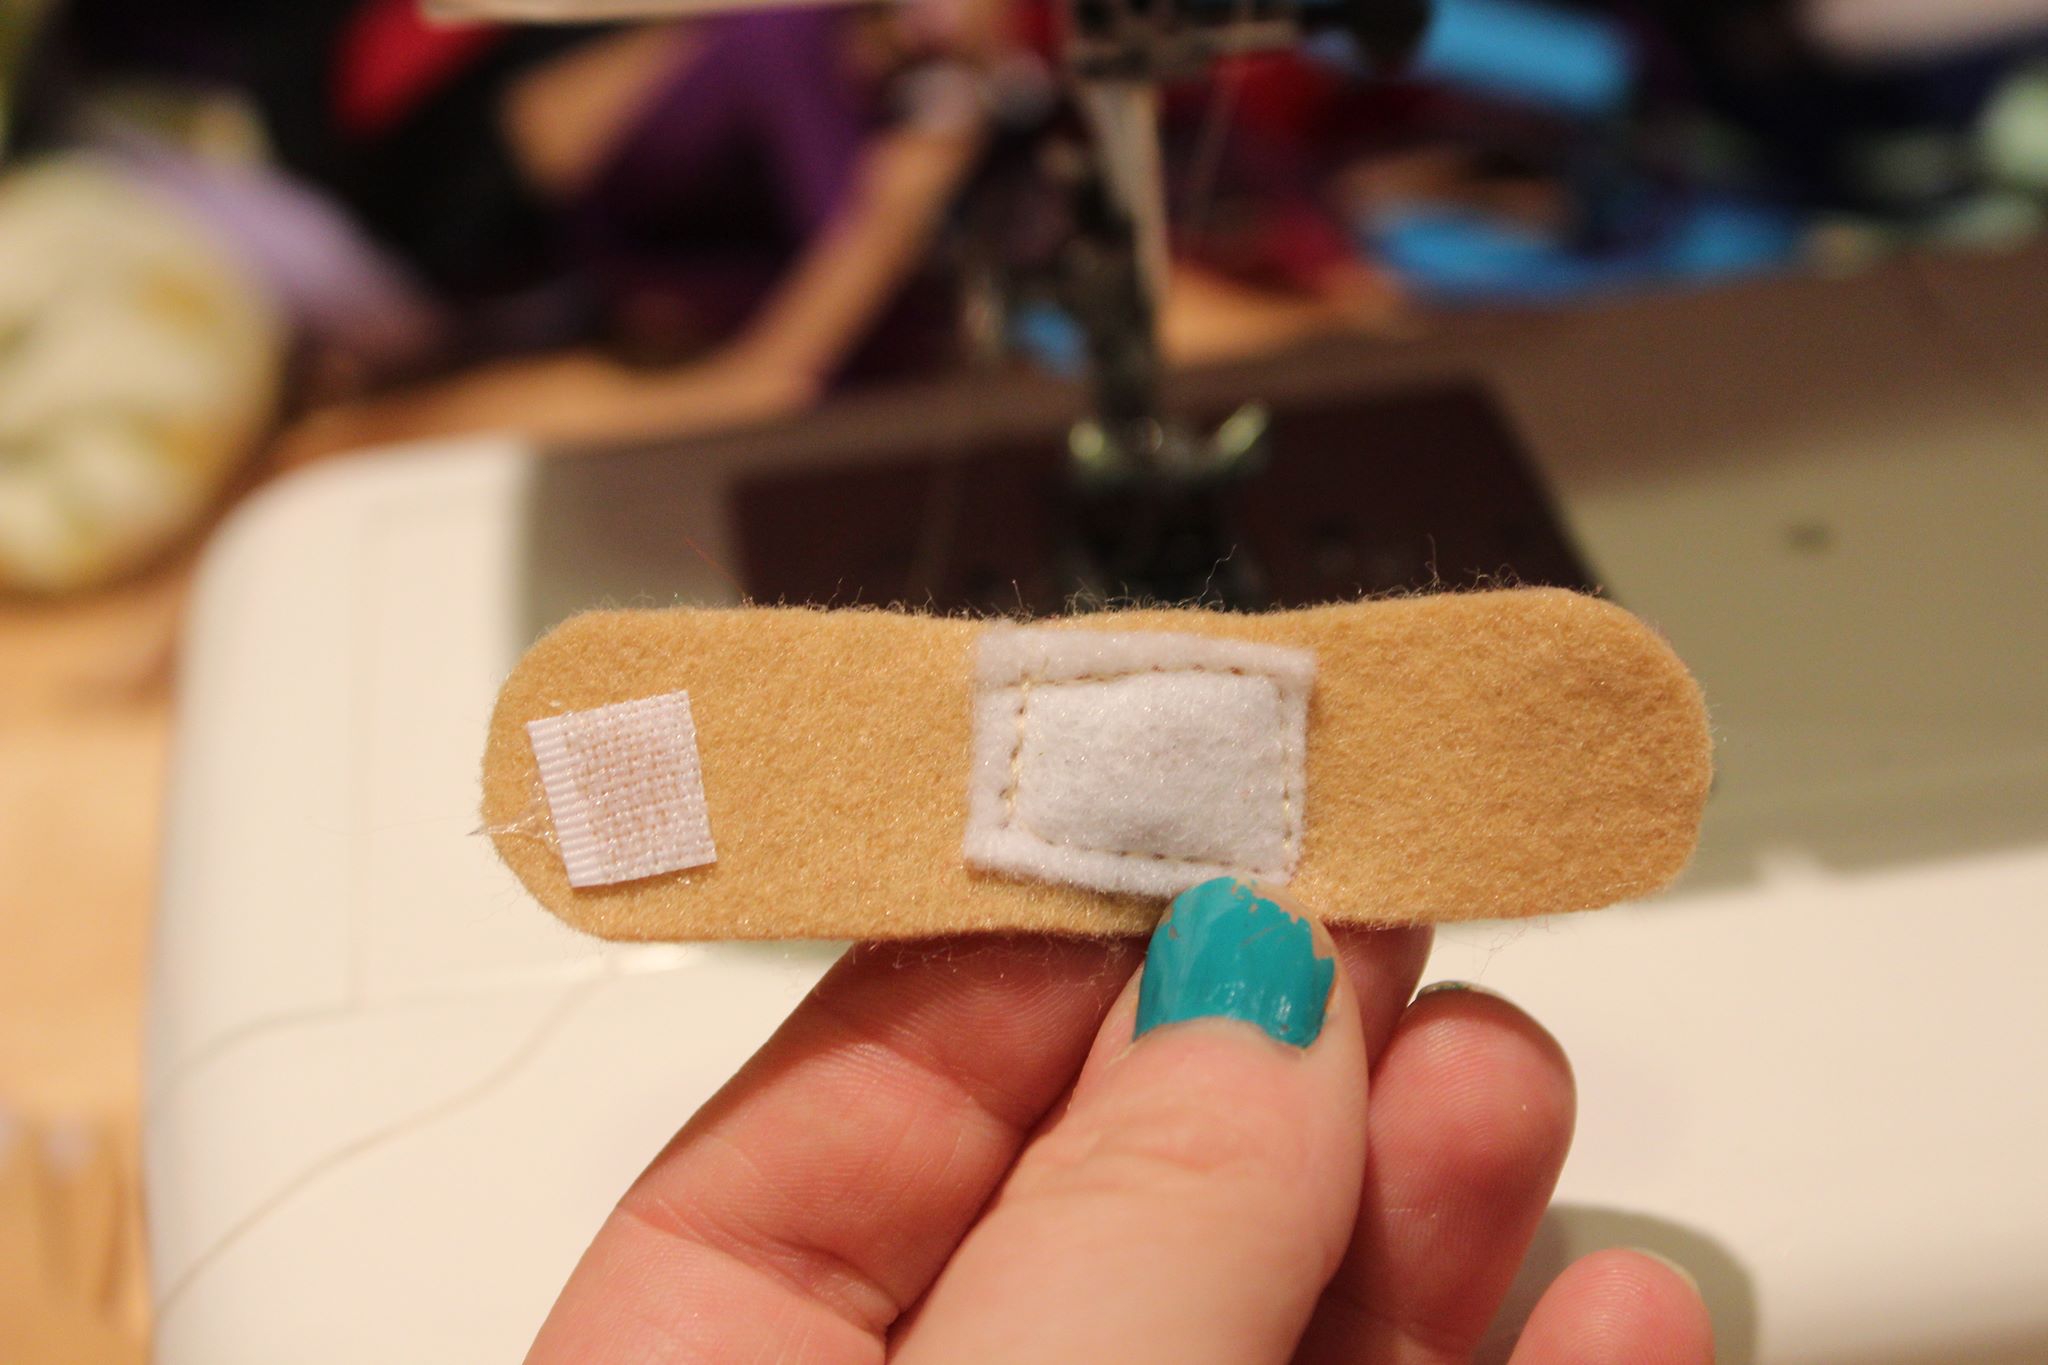
- Next, I cut the Velcro using the scissors. Again, this was approximate, ¼ inch strips, then in half.
- The next step is trimming the edges of the ‘bandages’ to be rounded.
- With all my ‘bandages’ and ‘gauze’ cut, I next use the hot glue gun to put on the Velcro (tip: do not buy velcro with adhesive already on it, it doesn’t stick well to felt, buy the sew on stuff and hot glue it as I have done. It works way better). To have the ‘bandages’ loop around a finger like a real bandage, the pieces must be on opposite sides of the bandage and opposite ends.
- You can continue by gluing on your ‘gauze pads’ with the glue gun while you have it out. I prefer to sew the white ‘gauze’ on as it gives a more padded effect like the real thing.
- Then with a sharpie pen, on the side opposite of the ‘gauze’ I drew dots like the ventilation openings on a real bandage.

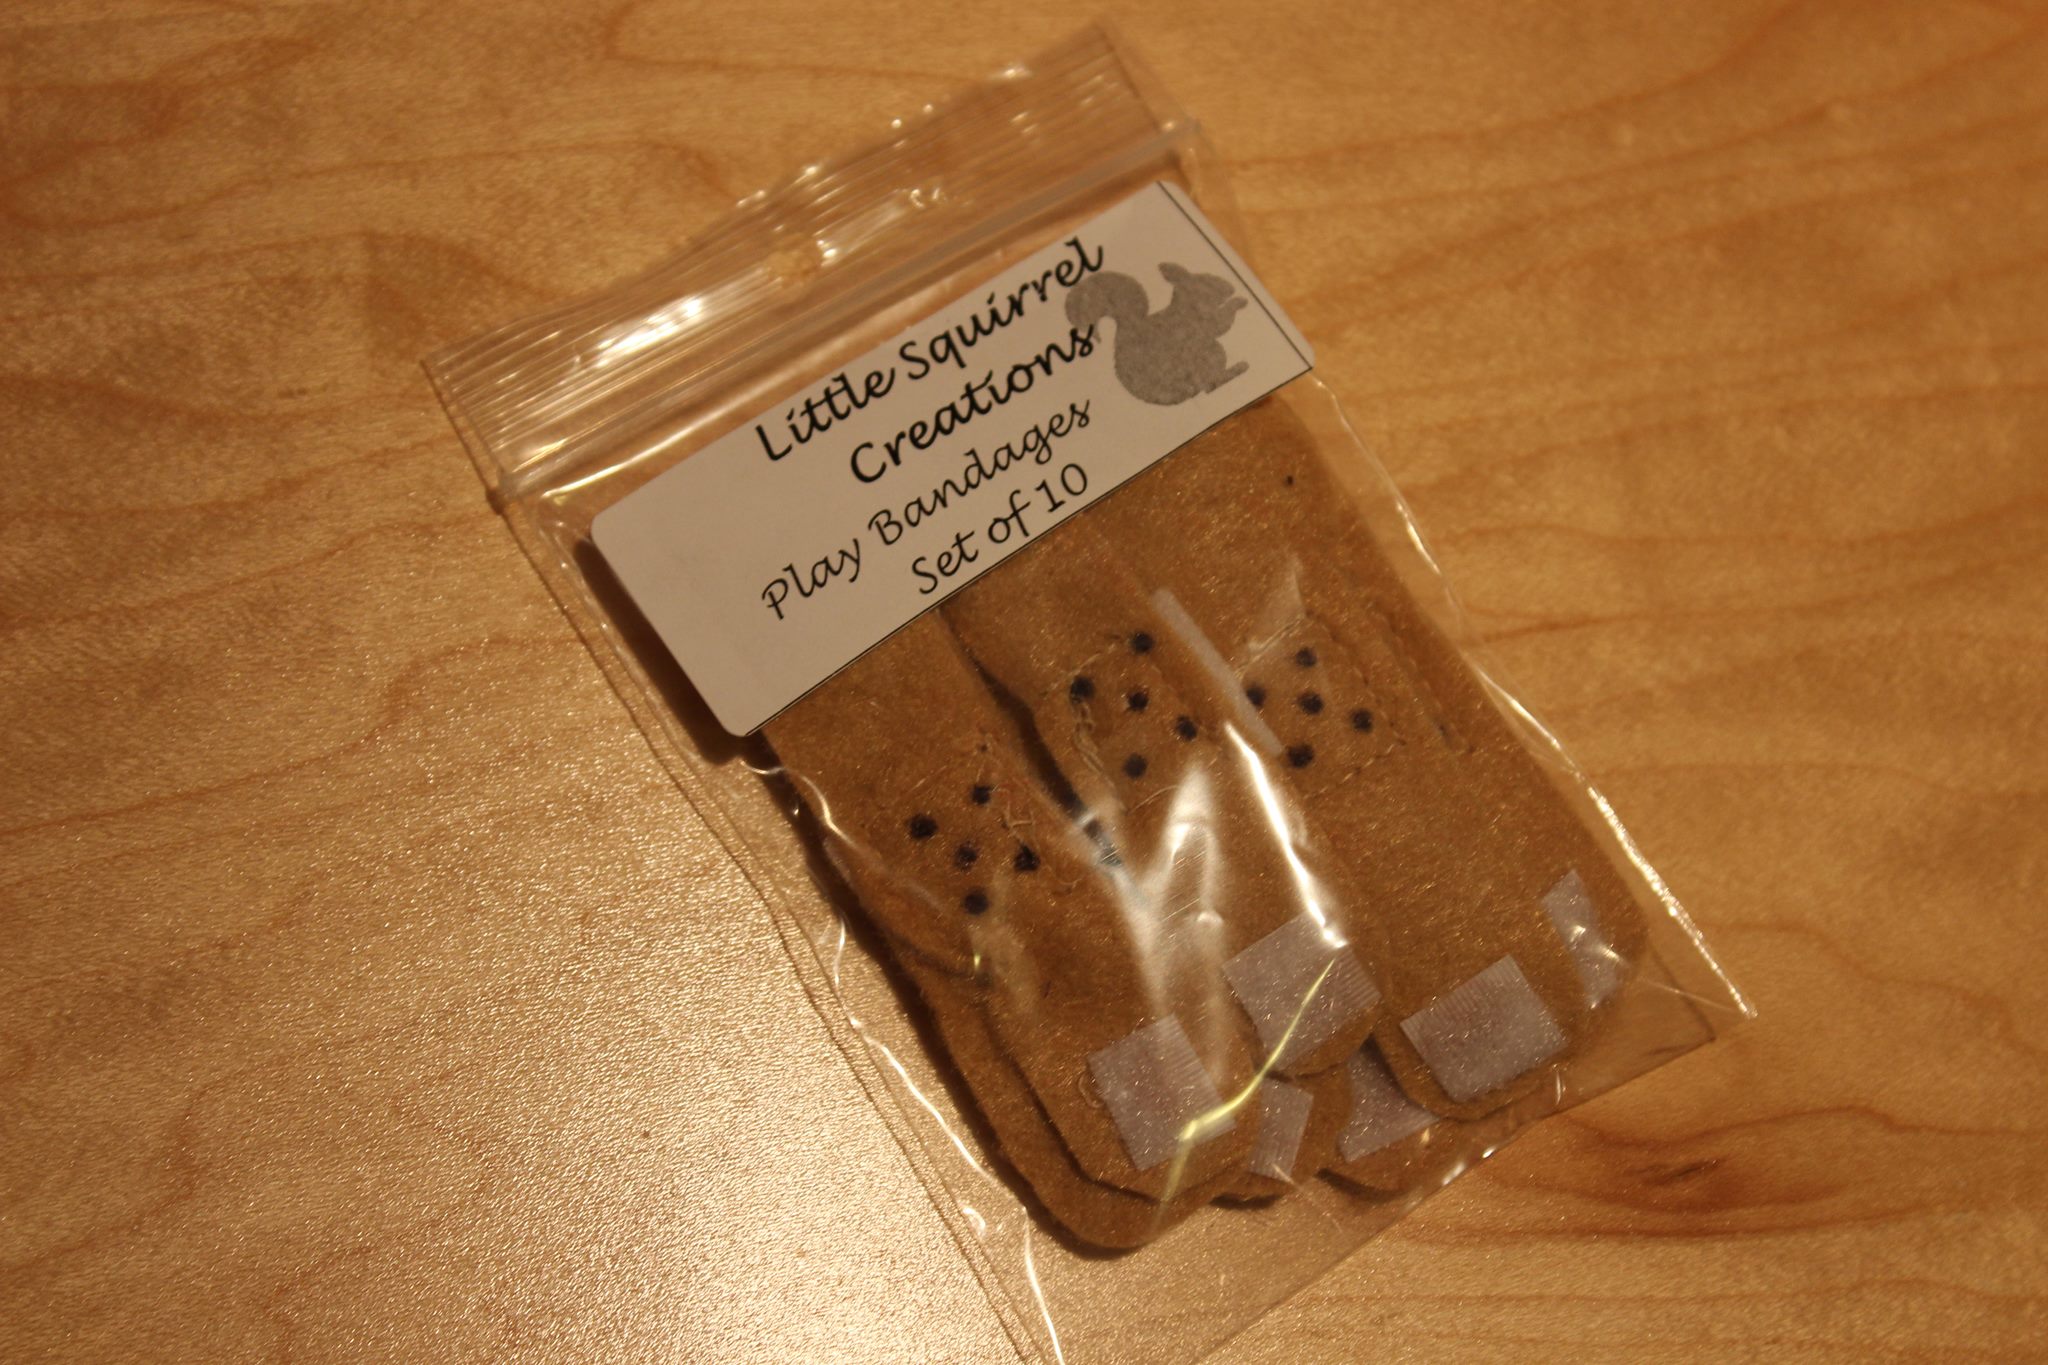
These are super easy and cute for imaginary play and humoring small children when every bump and bruise is deserving of a Band-Aid. The tutorial I used tan felt like most plastic bandages but to make the imaginary play more fun, you can make them in any color or combination. If your child is going to use their ‘bandages’ on their stuffed animals, skip the Velcro on the ends and use white Velcro loops as your ‘gauze’.
Little Squirrel Creations
Facebook // Email
——————————————————————————————————————————————————————————————————————–
These are super cute! Thanks for the detailed tutorial.
Hey!
I noticed a Jamberry Nail wrap on your one bandaid finger. I also noticed chipped nail-polish on a few other fingers 😉
How do you like the Jamberry wraps? Would you be interested in doing a review for a free half sheet?
Also,
congrats on loosing the 14lbs. I myself was over 180 about a year ago. I am happy to say that I am now down to 156 but it takes a lot of work and dedication and a lifestyle change to my eating! So way to go! Nothing in life is easy, but it’s all about learning and always looking to improve. Congrats.
Kelly Wilkinson
Hi Kelly; thanks for your comment!
Actually this DIY was not done by me and therefore those are not my nails 😉 I have tried Jamberry, and they are fabulous, when I have the time in the evening I put a set on.
Thanks again!
Tairalyn
These are super cute! Thanks for the detailed tutorial. I have no regrets and will use these play bandages as real bandaids for my fingers.